

Installing a large louvered pergola can be a game - changer for your outdoor space. It not only adds a touch of elegance but also provides practical benefits like shade and protection from the elements. As a large louvered pergola supplier, I've seen firsthand how these structures can transform a backyard or patio. In this blog, I'll walk you through the steps of installing a large louvered pergola.
Step 1: Planning and Preparation
Before you even think about picking up a tool, you need to do some serious planning. First off, measure the area where you want to install the pergola. Make sure there's enough space for the size of the pergola you've chosen. You don't want it to be too cramped or, on the flip side, look tiny in a huge open area.
Check the local building codes and regulations. Some areas have specific rules about the height, size, and placement of outdoor structures. You don't want to get into trouble later on for not following the rules. You can usually find this information on your local government's website or by giving them a call.
Also, think about the purpose of your pergola. Are you going to use it for dining, lounging, or maybe as a place to grow some climbing plants? This will help you decide on the best location and features for your pergola. For example, if you're using it for dining, you might want it closer to your house for easy access.
Step 2: Gathering Materials and Tools
Once you've got your plan in place, it's time to gather all the materials and tools you'll need. As a supplier, I can tell you that getting high - quality materials is crucial for a long - lasting pergola. You'll need the louvered panels, the frame, screws, bolts, and any other hardware that comes with your pergola kit.
For tools, you'll definitely need a drill, a level, a tape measure, a saw (if you need to cut any of the materials), and a wrench set. Make sure all your tools are in good working condition before you start. If you're not sure what tools you need, most pergola kits come with a list of recommended tools.
Step 3: Preparing the Site
The site where you're going to install the pergola needs to be flat and stable. If the ground is uneven, it can cause your pergola to be unstable and might even lead to damage over time. You can use a shovel to level the ground if it's a bit bumpy.
If you're installing your pergola on a concrete slab, make sure it's clean and free of any debris. If you're installing it on grass or soil, you might need to dig some holes for the posts. The depth and diameter of the holes will depend on the size and weight of your pergola. A good rule of thumb is to dig the holes about one - third of the height of the posts.
Step 4: Assembling the Frame
Now it's time to start assembling the frame of your pergola. Most large louvered pergolas come in a kit with pre - cut pieces, which makes the assembly process a lot easier. Start by laying out all the pieces and matching them up according to the instructions.

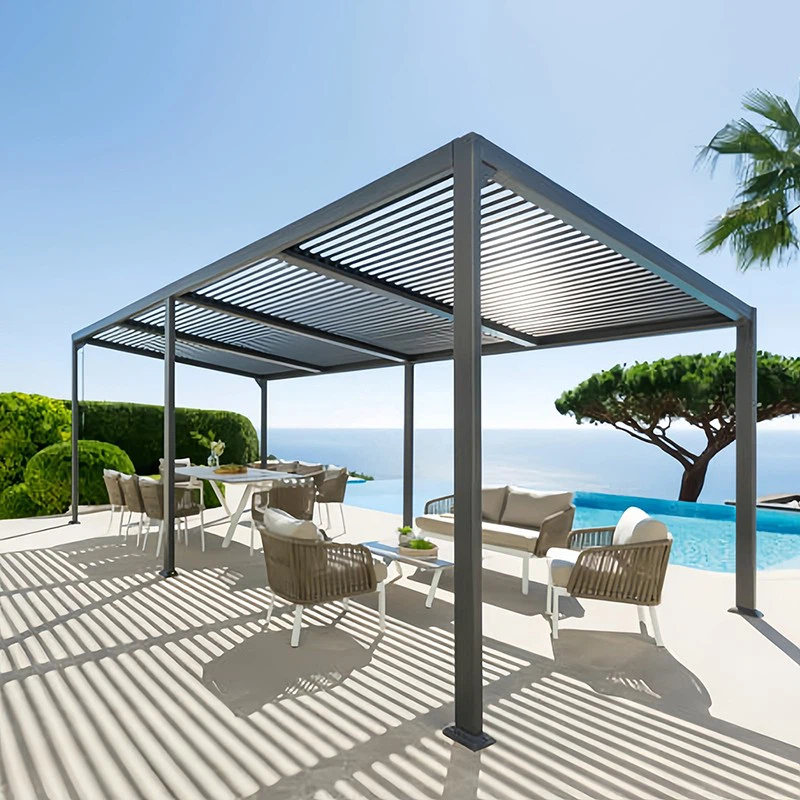
Use the drill and the appropriate screws or bolts to connect the pieces together. Make sure to use a level to ensure that the frame is straight and level at all times. This will prevent any problems later on when you're installing the louvered panels.
If you're having trouble with the assembly, don't hesitate to reach out to us as your supplier. We have a team of experts who can provide you with guidance and support.
Step 5: Installing the Louvered Panels
Once the frame is assembled and in place, it's time to install the louvered panels. These panels are what give your pergola its unique look and functionality. They can be adjusted to control the amount of sunlight and shade you get.
Start by attaching the panels to the frame using the provided hardware. Make sure the panels are evenly spaced and aligned properly. You might need to use a level again to ensure that the panels are straight.
Some louvered panels are motorized, which means you can control them with a remote. If you've chosen a motorized system, follow the instructions carefully to install the motor and connect it to the panels.
Step 6: Finishing Touches
After the louvered panels are installed, it's time for the finishing touches. Check all the connections and make sure everything is tight and secure. You can also add some accessories to your pergola, like lighting, curtains, or a fan.
If you're interested in other outdoor structures, we also offer Aluminium Gazebo with Retractable Roof, Adjustable Louver Pergola, and Aluminum Retractable Roof Awning. These can complement your louvered pergola and enhance your outdoor living experience.
Step 7: Testing and Maintenance
Once your pergola is fully installed, it's time to test it out. Adjust the louvered panels to see how they work and make sure everything is functioning properly. If you have a motorized system, test the remote to make sure it controls the panels as it should.
Regular maintenance is important to keep your pergola in good condition. Clean the louvered panels regularly to prevent dirt and debris from building up. Check the hardware for any signs of rust or looseness and tighten or replace them as needed.
Contact for Purchase and Consultation
If you're interested in purchasing a large louvered pergola or have any questions about the installation process, don't hesitate to contact us. We're here to help you every step of the way, from choosing the right pergola for your needs to providing support during the installation. Our team of experts can answer all your questions and give you personalized advice based on your specific situation.
References
- "Outdoor Living Structures: A Comprehensive Guide", Smith, John. 2022.
- "Pergola Installation Manuals", Various Manufacturers.